The Ultimate Concrete Grout Guide for Construction
Discover our comprehensive concrete grout guide for structural projects. Learn about surface preparation, curing, and non-shrink cementitious applications.
Table of Contents
- Surface Preparation and Substrate Saturation
- Material Selection and Engineering Properties
- Placement Techniques and Temperature Control
- Curing Protocols and Final Finishing
- Important Questions About the Concrete Grout Guide
- Comparing Grouting Approaches
- Practical Tips for Field Execution
- Wrapping Up
Key Takeaway
A concrete grout guide is a comprehensive framework detailing the preparation, placement, and curing of cementitious materials for structural load transfer. It ensures precision equipment and baseplates achieve optimal compressive strength and long-term durability in demanding construction environments.
Concrete Grout Guides in Context
- The global cementitious grout market is projected to reach 10.4 billion US dollars by 2030, growing at a compound annual growth rate (CAGR) of 5.7% from 2024 (Allied Market Research, 2024)[1].
- Non-shrink cementitious grouts represent about 52% of the global cement grout market by revenue due to their use in structural and precision equipment base applications (MarketsandMarkets, 2024)[2].
- ASTM C1107 requires non-shrink cementitious grouts to achieve a minimum compressive strength of 5,000 psi at 28 days in the fluid consistency range (ASTM International, 2023)[3].
When executing heavy industrial or commercial construction projects, a reliable concrete grout guide is essential for ensuring structural integrity. Cementitious materials used beneath baseplates and precision equipment are not mere fillers; they are critical load-transfer elements. This article explores the fundamental principles of grouting, from substrate saturation to final curing. We will examine the engineering requirements that dictate material selection, surface preparation protocols, and the environmental controls necessary to prevent shrinkage or debonding. By understanding these core concepts, contractors and engineers can avoid premature failure and misalignment. Whether you are reviewing an initial hello world announcement on a new construction blog or managing a massive infrastructure rollout, mastering these techniques guarantees that your foundation system performs exactly as designed. Let us dive into the technical specifications and best practices that define modern grouting procedures.
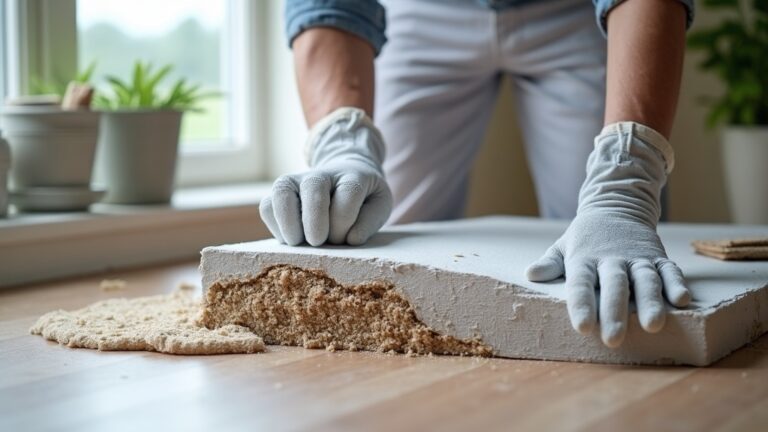
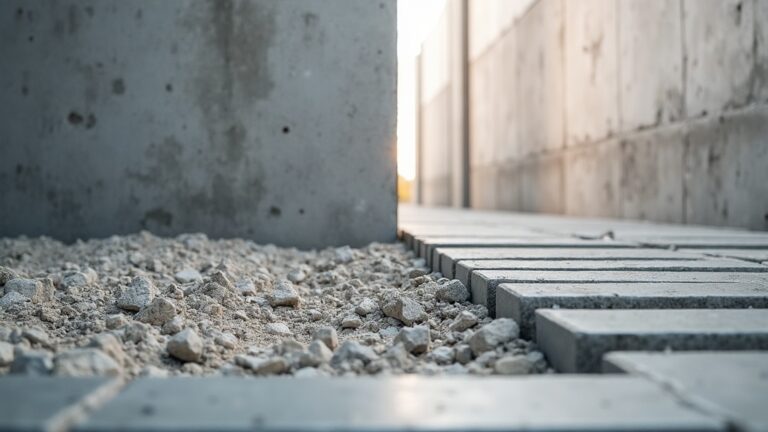
Surface Preparation and Substrate Saturation
Proper surface preparation is the foundational step that dictates the long-term bonding success of any cementitious application. Before any material is mixed, the concrete foundation must be meticulously prepared. Industry application guides specify that cement-based grouts should not be placed at depths of less than 25 millimeters to ensure proper load transfer and durability (Big League Construction Services, 2024)[4]. To achieve this, the substrate must be roughened to expose the aggregate and be completely free from dust, oil, or laitance.
Paul Lagace, Senior Product Engineer at Sika Corporation, emphasizes this critical phase: “Concrete surfaces should be roughened and saturated with clean water for at least 24 hours before placing cementitious grout” (Sika Corporation, 2025)[5].
This saturation process, often called presoaking, prevents the dry concrete substrate from rapidly absorbing the mixing water out of the fresh grout. Best-practice grouting guides recommend presoaking concrete foundations with clean water for 18–24 hours before placing cementitious grout to reduce substrate absorption and shrinkage (Sika Corporation, 2024)[5]. If the substrate steals the water, the cementitious matrix will fail to hydrate properly, leading to plastic shrinkage cracks and a weak bond line.
After the presoaking period, all free water must be removed just before placement. The surface should be saturated surface-dry (SSD). This meticulous attention to moisture conditions ensures that the grout maintains its designed water-to-cement ratio, preserving its non-shrink properties and ultimate compressive strength. For more insights on mixing equipment used in these preparatory phases, you can explore our uncategorized colloidal mixer articles to find the right tools for achieving a homogeneous slurry.
Material Selection and Engineering Properties
Selecting the appropriate material requires a thorough understanding of the structural demands and environmental conditions of the specific project. Not all grouts are created equal, and choosing the right product is paramount for structural stability. Non-shrink cementitious grouts represent about 52% of the global cement grout market by revenue due to their use in structural and precision equipment base applications (MarketsandMarkets, 2024)[2]. These specialized formulations are engineered to maintain their volume after setting, preventing the formation of voids beneath heavy machinery.
Dr. Jeffrey R. Roesler, Professor at the University of Illinois Urbana-Champaign, notes: “For precision equipment and baseplates, cementitious grout is not just a filler; it is a structural load-transfer element” (University of Illinois Urbana-Champaign, 2025)[6].
When evaluating products, engineers must look at standardized testing metrics. ASTM C1107 requires non-shrink cementitious grouts to achieve a minimum compressive strength of 5,000 psi at 28 days in the fluid consistency range (ASTM International, 2023)[3]. However, for heavy industrial applications, standard strengths are often insufficient. Typical cementitious machine-base grouts used in industrial applications are designed to reach compressive strengths between 8,000 and 12,000 psi at 28 days (Sika Corporation, 2024)[7].
Furthermore, the grout must be designed as part of the load path. “When grouting machine bases, the grout must be designed as part of the load path; inadequate thickness and poor consolidation can cause failure,” according to Dr. Konstantin Sobolev (University of Wisconsin–Milwaukee, 2024)[8]. By matching the material’s rheology and strength profile to the specific load requirements, contractors ensure the foundation system operates as a unified structural mass.
Placement Techniques and Temperature Control
The physical placement of the material demands strict adherence to environmental controls and procedural methodologies to guarantee complete consolidation. Once the material is mixed, the physical application must be executed swiftly and methodically. Environmental factors play a massive role in the hydration process. Technical bulletins for cementitious grouting recommend maintaining grout and substrate temperatures at or above 4 degrees Celsius during placement and early curing to prevent strength loss and freezing damage (Sika Corporation, 2024)[5]. Conversely, in hot weather, excessive heat can accelerate setting times, reducing the working window and increasing the risk of cold joints.
Dr. Surendra P. Shah of Northwestern University highlights this vulnerability: “Non-shrink cementitious grouts are engineered to provide high early strength and minimal volume change, but their performance depends on temperature control” (Northwestern University, 2025)[9].
To achieve complete filling under baseplates, contractors often utilize head boxes or formwork that creates a hydrostatic head pressure. This pressure forces the fluid material into all crevices, displacing trapped air and ensuring intimate contact with the steel baseplate and the concrete substrate. The pouring process should be continuous, ideally from one side to the other, to prevent air pockets from becoming trapped beneath the plate.
Proper consolidation is vital. If the material is too stiff or placed too quickly without adequate head pressure, voids will form. These voids compromise the load transfer mechanism, leading to localized stress concentrations that can crack the baseplate or fracture the grout pad under dynamic machine vibration.
Curing Protocols and Final Finishing
Implementing rigorous curing protocols and precise finishing techniques protects the material during its most vulnerable early stages. The installation process does not end when the formwork is filled. Curing is a critical phase that directly influences the final durability and strength of the installation. Manufacturer application guides state that cementitious grouts typically require a minimum curing period of 48–72 hours protected from temperature extremes and vibration to reach approximately 3,000 psi before being placed into full service (Five Star Products, 2024)[10]. During this window, the material must be kept moist, often by applying wet burlap and plastic sheeting, or by using liquid membrane-forming curing compounds.
Premature exposure to heavy loads or dynamic vibration can disrupt the developing crystalline matrix, causing micro-fractures that compromise the structural integrity. Professor Ken Hover of Cornell University explains: “From an engineering perspective, grout under baseplates is part of the foundation system, so the contractor’s grouting procedures must be tightly controlled” (Cornell University, 2025)[11].
After the forms are stripped, the exposed edges require specific finishing to manage stress distribution. Field guidance documents recommend cutting exposed grout shoulders at a 45-degree angle from the base of the plate to the foundation to distribute loads evenly and reduce cracking risk (Big League Construction Services, 2024)[4]. This chamfered edge prevents the brittle edges from spalling off when subjected to impact or thermal cycling. For further technical standards and detailed specifications regarding structural installations, consulting the American Concrete Institute technical resources provides valuable context. Professionals seeking specialized products can also review the uncategorized concrete grout product listings for specific project needs.
Important Questions About the Concrete Grout Guide
What is the minimum thickness for cementitious grout placement?
Industry application guides specify that cement-based grouts should not be placed at depths of less than 25 millimeters to ensure proper load transfer and durability (Big League Construction Services, 2024)[4]. Placing the material thinner than this threshold risks inadequate consolidation and poor structural performance. When the layer is too thin, it cannot properly distribute dynamic and static loads from the baseplate to the underlying concrete foundation. This leads to localized crushing, cracking, and eventual misalignment of precision equipment. Contractors must verify baseplate elevation and chip away existing concrete to guarantee the minimum depth is achieved.
How long should the concrete substrate be presoaked before grouting?
Best-practice grouting guides recommend presoaking concrete foundations with clean water for 18–24 hours before placing cementitious grout to reduce substrate absorption and shrinkage (Sika Corporation, 2024)[5]. This extended saturation period ensures that the pores of the existing concrete are completely filled with water. If the substrate is dry, it will rapidly draw moisture out of the freshly placed grout, severely disrupting the hydration process. This moisture theft leads to plastic shrinkage, weak bond lines, and reduced compressive strength. After presoaking, all free water must be removed, leaving a saturated surface-dry condition.
What temperature limits apply during grout placement and curing?
Technical bulletins for cementitious grouting recommend maintaining grout and substrate temperatures at or above 4 degrees Celsius during placement and early curing to prevent strength loss and freezing damage (Sika Corporation, 2024)[5]. Cold temperatures slow down chemical hydration reactions, delaying strength gain and increasing the risk of frost damage if the water within the matrix freezes. Conversely, high temperatures cause the material to set too rapidly, reducing working time and creating cold joints. Contractors must use insulated blankets or chilled mixing water to maintain the material within the optimal thermal range.
Why is it necessary to cut exposed grout shoulders at an angle?
Field guidance documents recommend cutting exposed grout shoulders at a 45-degree angle from the base of the plate to the foundation to distribute loads evenly and reduce cracking risk (Big League Construction Services, 2024)[4]. A sharp, 90-degree vertical edge is highly susceptible to spalling and chipping when subjected to mechanical impact or heavy vibrations. By chamfering the edge to a 45-degree slope, structural stress is distributed more gradually into the foundation pad. This simple finishing technique significantly enhances long-term durability, preventing debris from falling into the machinery while protecting the load path.
Comparing Grouting Approaches
Selecting the right placement methodology depends heavily on the baseplate design, accessibility, and the specific rheology of the chosen material.
| Method | Best Application | Key Advantage |
|---|---|---|
| Dry-Pack | Small bearing areas, shallow depths | High stiffness, minimal formwork required |
| Fluidity (Pourable) | Large baseplates, complex geometries | Excellent consolidation, fills deep voids easily |
| Plastic Consistency | Standard machinery, moderate loads | Balanced flow and strength, easy to screed |
Each method requires a specific water-to-cement ratio and mixing technique. While dry-pack methods rely on manual tamping to achieve consolidation, pourable methods utilize hydrostatic head pressure to flow beneath the plate. Reviewing a detailed concrete grout guide helps contractors match the consistency to the physical constraints of the job site, ensuring optimal load transfer and structural longevity across varied industrial applications.
Practical Tips for Field Execution
Successful field execution relies on meticulous planning, continuous monitoring, and strict adherence to manufacturer specifications throughout the entire installation process. To achieve the best results, always conduct a mock-up or trial batch before the actual installation to verify the material’s flowability and setting time under current site conditions. Ensure that all formwork is watertight and braced securely to withstand the hydrostatic pressure generated during a continuous pour.
When mixing, use forced-action or colloidal mixers rather than standard drum mixers to achieve a uniform, lump-free consistency that maximizes the material’s designed strength. Monitor ambient temperatures closely, and be prepared to adjust your mixing water temperature to keep the final product within the optimal thermal range. Never re-temper the material by adding water after the initial mixing is complete, as this drastically weakens the final matrix and destroys the non-shrink properties. Finally, protect the freshly placed material from wind, direct sunlight, and premature vibration to ensure a flawless structural bond.
Wrapping Up
Mastering the principles of structural grouting ensures that heavy machinery and precision equipment remain perfectly aligned and fully supported for decades. From rigorous surface preparation and substrate saturation to precise temperature control and final edge chamfering, every step in this concrete grout guide plays a vital role in the overall success of the foundation system. By treating the material as a critical structural component rather than a simple filler, engineering teams can prevent costly misalignments and premature failures. We encourage you to explore more specialized construction techniques and equipment insights right here on colloidalmixers.com to further elevate your project execution and structural engineering capabilities.
Further Reading
- The global cementitious grout market. Allied Market Research.
https://www.alliedmarketresearch.com/cementitious-grout-market-A113742 - Non-shrink cementitious grouts represent about 52%. MarketsandMarkets.
https://www.marketsandmarkets.com/Market-Reports/non-shrink-grout-market-24780676.html - ASTM C1107 requires non-shrink cementitious grouts. ASTM International.
https://www.astm.org/c1107_c1107m-23.html - Industry application guides specify that cement-based grouts. Big League Construction Services.
https://bigleaguecs.com/best-practices-for-cementitious-grout-preparation-and-placement - Guide to Cementitious Grouting – Technical Bulletin. Sika Corporation.
https://usa.sika.com/dam/dms/us01/v/guide-to-cementitious-grouting-tech-bulletin.pdf - Advanced Materials and Practices for Precision Concrete Construction. University of Illinois Urbana-Champaign.
https://publish.illinois.edu/roesler-research-group/precision-concrete-grouting-practices - Sika Grout Technical Data. Sika Corporation.
https://usa.sika.com/content/dam/dms/us01/v/sika-grout-technical-data.pdf - Practical Design and Execution of Cementitious Grouting. University of Wisconsin–Milwaukee.
https://uwm.edu/civil-environmental-engineering/wp-content/uploads/sites/30/2024/12/cementitious-grouting-guide.pdf - High-Performance Cementitious Grouts for Structural Applications. Northwestern University.
https://www.mccormick.northwestern.edu/civil-environmental/research/materials/cementitious-grouts-guidelines.pdf - Five Star 59 Installation Instructions. Five Star Products.
https://www.buildsite.com/pdf/fivestarproducts/Five-Star-59-Installation-Instructions-1095014.pdf - Concrete Construction Practices: Grouting and Baseplate Installation. Cornell University.
https://courses.cornell.edu/concrete-construction-grouting-practices-2025.pdf